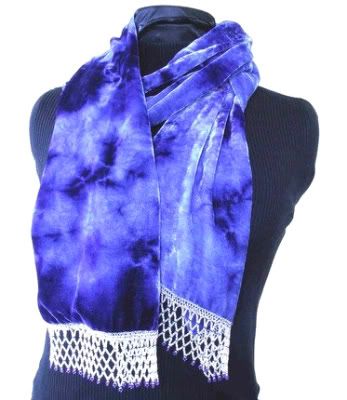
Today, my guest is Virginia of Goblins’ Market, who shares the origins of her favorite beading technique.
Inspirational Beading: What is your all time favorite beading or jewelry technique?
Virginia: It is so hard to choose a favorite. I love to make netted beaded fringes on scarves and I love to work in circular right angle weave.
Inspirational Beading: How do you first learn to use this technique?
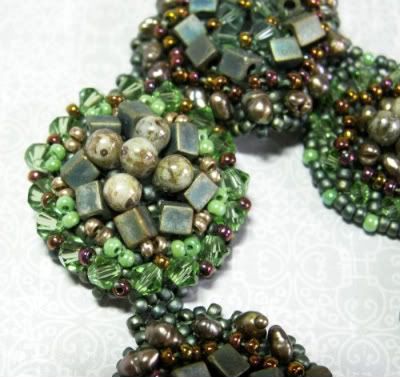
Virginia: I worked out netted fringe on my own but learned the stitch I use to create a foundation row from a Bead & Button magazine in the early 1990's. I learned circular right angle weave from a Marcia DeCoster article in Bead & Button several years ago.
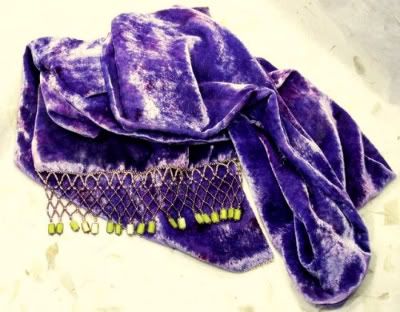
Virginia: I think my favorite creation so far is a scarf I made for a friend's daughter last spring. It was made with an orchid purple silk/rayon velvet that I dyed and overdyed myself, and edged with a gorgeous netted fringe. I used some yummy green table cuts for the fringe finials.
I really enjoyed working with such rich colors on that sumptuous velvet surface. I also really enjoy knowing that the recipient will value this scarf for a long time - both as a gift from her dad and something hand made by me. I hope her daughters will enjoy it as much as she does! I love to work on custom orders - especially when they involve both fiber and beads!
Inspirational Beading: Can you share any tips for getting started with this method?
Virginia: When working with a beaded fringe, it is very important to have a sturdy, well spaced foundation row. I'm working on creating a tutorial to offer in my shop on creating a foundation row - I may get it done by January 2011. (And that may be a very optimistic estimate!)
The foundation row secures the fringe to the fabric and is the basis for the spacing of your fringe. Getting that on neatly is the first important step. The next challenge with beaded fringe is to work with a fairly long thread and to remember to tie off often. The length of thread I work with is often prone to tangling, especially since I work with a doubled thread for strength.
I always tie off after every third section of netting or after every 4 or 5 single strands. This minimizes bead loss and re-working time if the unthinkable happens to your scarf and the fringe gets broken. I also always include a small vial of repair beads for these velvet scarves. They may travel a very long time in their lifetimes and I want their owners to be able to easily find the necessary beads for a repair, should that ever be needed.
Inspirational Beading: Do you have a favorite material to use it with?
Virginia: Silk Velvet! I also put simpler beaded fringes on some of my other hand painted and dyed scarves but velvet and silk dupion are the only fabrics I've worked with so far that really can carry the weight and luxury of a full netted fringe really convincingly.
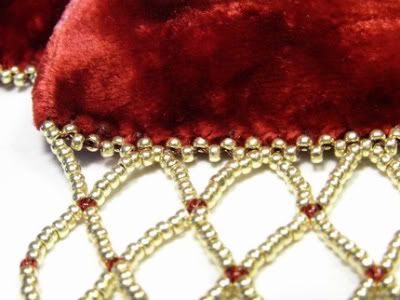
Virginia: I would recommend that they learn the foundation stitch. Once one has learned to put the foundation row on neatly and without significant trouble with tangles, they will have worked with the beads and the fabric enough to begin making intuitive guesses about how they can add onto and embellish that basic foundation. The foundation row lends itself very nicely to peyote stitch - I have added solid peyote strips to the bottoms of scarves instead of dangling fringes in the past to very good effect! - and to many variations of fringes.
Inspirational Beading: In your opinion, what is the best place for beginners to learn this technique?
Virginia: I am a "manipulative" and visual learner, so learning from illustrations in a magazine works well for me. (That's a good thing because we live very far from any large city with an active beading guild!) Anyone who is an auditory learner should look for a teacher, a class or a guild to learn from.
Recommend sites for fiber arts and more:
Stitchin Fingers
Pin Tangle
ArtCloth Studios
Copyright 2010 Inspirational Beading and Goblins' Market
Related Site
- title="mens clothing online, cheap womens clothes, fashion tops">Clothes Shops
-How Buy Cheap clothes Online
Related Videos :below I show related videos and not so related to this article.
Title: Jon Fitch learns some technique from Chris Fleeger
I (Jon Fitch) took some footage of All-American Purdue University wrestler, Chris Fleager, before I moved to California in 2003. He showed me some of his favorite techniques. I slowed them down so you can see the detail in his movements.
Title: Tattered Angels Girly Grunge Cardboard techniques
In this video, Tattered Angels Education Coordinator Liz Hicks shares with you her favorite techniques with altering cardboard. She also uses the brand new and fun Glimmer Glam to give her project that extra little sparkle.


0 comentarios:
Post a Comment