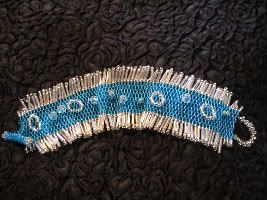
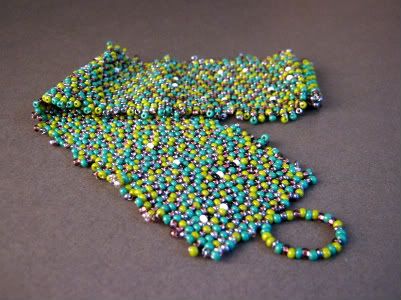
One of the most important stitches that any beadweaver will learn is the versatile and endlessly useful peyote stitch. Also called gourd stitch, the seemingly simple pick-up-one-skip-one pattern can be one of the most frustrating to master. Although the basic concept is easy enough to understand, finding the right tension and making the beads go where they should takes a lot of practice.
For first time bead weavers, I always recommend the two-bead version, or two-drop peyote stitch, which follows the exact same pick-up-stitch pattern, but is much easier to handle. By using two beads per stitch instead of one, the beadwork is less likely to curve, sway and twist. You can also create wider pieces of flat beadwork much quicker with two-drop peyote, because you're picking more beads per stitch.

Pick up any number of seed beads divisible by 4 - but not so many that stitching will be difficult. 24 beads is a great number for a basic cuff bracelet. Slide the beads down to the stopper, and turn the beadwork so that the stop-bead is at the top.
Pick up 2 seed beads and slide them over the needle, but do not push them down to the main beadwork. Grasp the bottom 4 seed beads from the original 24 with your left thumb and forefinger, making sure that the entire strand is snug against the stopper. With the needle in your right hand, skip the first two beads, and stitch up through the 3rd and 4th seed bead. Pull the thread gently until the new beads are secure against the beadwork.
You should now have a little square of 4 seed beads at the bottom of the beadwork. This completes the first stitch. Pick up 2 more seed beads, and perform another peyote stitch: Grasp the beadwork firmly, and skip the next two beads in the strand, stitching up through the following two. Gently pull the thread tight, and make sure the new beads are snug.
Continue adding seed beads two at a time until your thread exits the top of the bead strand - do not stitch through the stop-bead. Turn the beadwork over again, so that the stop-bead is at the bottom, and the first row of beads is to your left.
Pick up 2 seed beads, and stitch up through the two raised beads in the previous row. Pull the thread tight. Continue adding beads in this manner, flipping the beadwork to start each new row.
To add new thread, remove the needle when there is about 4 inches of thread remaining at the end of a row. Attach a stop bead to a new length of thread, and stitch into the beadwork at least 6 beads down from your last stitch. Exit from the same beads as your previous thread. Weave the old thread into the beadwork and trim. Pick up the new thread, and continue stitching as before.
When the beadwork is the desired length, complete the last row, making sure that your working thread is exiting from the opposite side as the original stop bead, so that the rows are even. Use the remaining thread, and the original tail, to attach each half of a clasp.
If desired, you can use your favorite fringe technique to embellish the top and bottom edge of the cuff, which will help protect the threads. My Monster Mash cuff has straight fringe using 2-5 seed beads at random.
Give it a try! Two-drop peyote is a great introduction to basic flat beadweaving, and is perfect for one of a kind bracelets!
Copyright 2009 Inspirational Beading
Related Site
- title="mens clothing online, cheap womens clothes, fashion tops">Clothes Shops
-How Buy Cheap clothes Online
Related Videos :below I show related videos and not so related to this article.
Stretch your herringbone stitch skills with my original earring design. I'm sorry to all viewers who are unhappy that there is no text. Please, I would appreciate it if you would not leave angry comments. I spent hours on this project and it's here for you to look at free of charge. This was my first attempt at using Windows Movie Maker and I didn't know how to add text. If you would like detailed explanations of each step, here is a link to a photo set I made: http://www.flickr.com/photos/ambrosianbeads/sets/72157603841577351 I am trying to improve my videos and I hope people will be patient with me. Have a great day :-)
Learn to make a wrapped loop in this video tutorial. For more tutorials, custom jewelry and jewelry making bead kits, check out http://verydesigner.com.


0 comentarios:
Post a Comment